Preface
Every developer knows how it is hard and tedious sometimes to spin up the local Drupal environment. This is one of the main reasons why virtual machines are becoming popular right now. Drupal VM is one of such things which help web-developers to make the whole process easier. In addition, you get a universal solution that will work equally on different host-machines with different operating systems.
In this article, I want to review the main topics related to an installation and usage of Drupal VM. It concerns the installation process itself and also some key moments which need to be considered to avoid possible problems during the installation and upgrade of your virtual machine. Besides, you will know how to migrate an existing website to this environment and how to extend the default configuration for your needs. I hope it will help you become familiar with Drupal VM and make your choice in favor of using this environment.

Installation
It’s worth noticing that this is quite easy to get started with Drupal VM if you’ve already had some experience in configuring virtual environments. You just need to stick to the following rules:
- Keep Vagrant and Virtualbox up to date. It will help you to veer away from the most of the issues which are related to versions incompatibility.
- During an installation process clone Drupal VM from the official github-repository. In such a case you can easily apply any updates and save your local modifications by using git-commands.
- If there are any mistakes during the course of running vagrant up and it drops you back to the command prompt, just run vagrant provision to continue building the virtual machine from the same place where everything was interrupted.
If you haven't used the virtual machines yet, it would be better to start with a study of the related technologies. In the first place I mean Vagrant and the basic Vagrant commands like vagrant up, vagrant halt, vagrant destroy, etc. It will help you to understand more clearly how to control operation of the virtual machines. Then you should pay attention to a structure of the default configuration file (default.config.yml). I will write some key moments regarding it a little bit later.
So, if you are familiar with things that I mentioned before, we can start. Clone Drupal VM repo into a necessary directory, go to the root VM directory and run the vagrant up command. For the beginning, it would be better to start without any changes in the configuration file. Just to be sure that everything works properly.
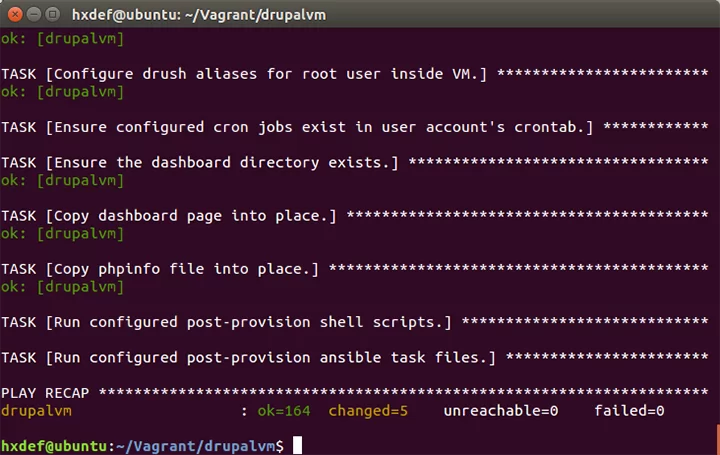
After the installation, you will see general statistics. It includes a number of processed tasks and a counter of mistakes which may occur during a deployment process. If there are no errors here, you reached your goal! Try to open a new website in your browser.

What we get after an installation
Afterwards, an installation of Drupal VM with the default settings set we get the following things:
- A pure website in Drupal 8.
- Tools to manage this website (Adminer, Mailhog, PimpMyLog, etc.).
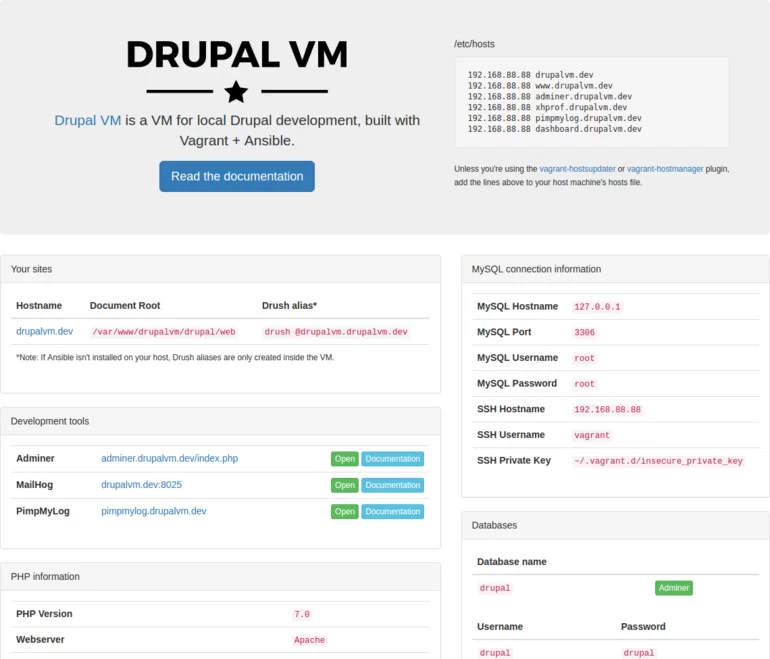
- An informative dashboard which contains links to the mentioned tools and a list of credentials.

It’s not a problem to extend the default configurations. Some useful examples you can find in the default.config.yml file.
Migrate an existing website
Further, it's quite reasonable to hear such a question - how to migrate an existing website to this environment? So, to do this we need to perform the following steps:
- Disabling an automatic installation of Drupal.
- Mounting the local Drupal codebase.
- Uploading a database to the virtual machine.
For changing the VM settings you need to copy the default VM configuration from the default.config.ymlfile to the config.yml file. This file will contain the overridden settings. This action will make an updating process easier for you. For example, if you decide to update your VM from a git-repository by using the git pull command, just a comparison of changes between mentioned files will be enough to find the differences and adding them to your configuration file.
Disable an automatic installation of Drupal
The first thing that you should do is disabling an automatic installation of Drupal. In the config.yml file set all the build_ variables and install_site to false.
build_makefile: false

build_composer: false

build_composer_project: false

...

install_site: false
Technically it’s not a problem to keep several projects on the same virtual machine. For instance, we could migrate an existing website next to the default Drupal installation (which we already have). However, the right workflow is a usage of a separate virtual machine per each project. In this case, it will be easier for you to switch between existing projects. They will not affect each other.
Mount the local Drupal codebase
Next thing will be updating the vagrant_synced_folders configuration in accordance to your file structure.
vagrant_synced_folders:

 - local_path: ~/Sites/my-drupal-site

   destination: /var/www/my-drupal-site

   type: nfs
You don’t need to copy required files directly to the virtual machine. This configuration syncs your local Drupal codebase to a folder within the VM.
Upload a database to the virtual machine
If you have adminer listed as one of the installed_extras in config.yml file, you can use this tool to interact with databases. By default, a link to Adminer’s web-interface is available on a Dashboard page. Just make sure that your virtual machine is running. Also, along with Adminer, you can use some external tools: MySQL Workbench, Sequel Pro or similar clients.
Flexible configuration
Let’s assume that we’ve already deployed our application to the local environment. But what should we do if our website requires some complex solutions for working with cache, search system optimizing, advanced debugging and so on? Actually, almost nothing. Drupal VM includes a rich set of tools for web developers. It covers the majority of common problems. You just need to uncomment corresponding settings in the config.yml file and run the vagrant provision command to apply your changes.
Base components
From the beginning, you get an ability to change a web server and a database engine. Besides, it’s possible to specify versions of PHP and Drupal. For more details about the available options see the list below:
- Apache 2.4.x (or Nginx)
- PHP 7.0.x (configurable)
- MySQL 5.7.x (or MariaDB, or PostgreSQL)
- Drupal 7 or 8
You even will be able to run your website under Drupal 6. However, it will require some additional manipulations. This situation is described in the official documentation.
Extra utilities
A set of the extra utilities includes tools for a database management, site administration, optimization, testing and so on. Below I list the extra utilities which can be found in the default.config.yml file (installed_extras section):
installed_extras:

 - adminer

 # - blackfire

 - drupalconsole

 - drush

 # - elasticsearch

 # - java

 - mailhog

 # - memcached

 # - newrelic

 # - nodejs

 - pimpmylog

 # - redis

 # - ruby

 # - selenium

 # - solr

 - varnish

 # - xdebug

 # - xhprof
You should leave uncommented only those things that are really needed in order not to drop down a performance of your computer.
Besides, take a look at the extra_packages section. Here you can add any extra apt or yum packages. Keep in mind, a right way is adding these packages only in the configuration file. If you apply some changes directly to the VM, you may lose them in the future (for example, during the work of the vagrant provision command).
Conclusion
Drupal VM aims to make configuring the local Drupal environment fast and simple and to involve new developers to a wonderful world of Drupal development on local virtual machines (instead of using an old MAMP/WAMP-based environment). If you installed all the necessary software, you can build a new virtual machine by using one simple vagrant command. As a result, you will get a fully functional website in Drupal 8 plus an informative dashboard page and a rich set of tools for managing your website.
It can be said that Drupal VM is a universal solution which is suitable for both novice Drupal developers and experienced programmers. Beginners will appreciate a quick installation and ease of daily using. Experienced Drupal developers will find for themselves all the necessary functionality for a comfortable development of complex solutions.
There is one more important thing. Drupal VM is actively supported and developed. It means if you keep the virtual machine up to date, a probability of errors will be minimal. You can also help to improve Drupal VM by submitting new issues or pull requests to the project on Github.
At the moment Drupal VM is one of the popular dev/test environments especially in case if you use it for working with Drupal websites. I highly recommend using this project as a start point for deployment your virtual machines. In this article, I described only the main features of Drupal VM. However, I hope it will help you to make your choice in favor of using this environment. Happy configuring!


