

In one of our previous posts, we told about the method of creating pages for a Drupal site that gives the site administrators and content managers more freedom and independence. We are talking about the Layout Builder module, on which a lot of hopes are pinned. In this post, we will take you through the steps necessary to create a beautiful site page with basic content management features.
Our post is intended for beginning Drupal developers and Drupal site owners who will want to read how to make their content managers’ jobs easier.
What is Layout Builder?
Let us recap what our first post was about. Layout Builder is a module whose flexibility allows you to create layouts for any type of content and use them to develop unique pages.
These pages use such bricks as sections, layouts, on which pages are based, and blocks filled with headers, descriptions, images, and other content entities.
The module developers took into account the page creation techniques using the Blocks, Paragraphs and Views modules, but eliminated the need to modify them with custom code and added some WYSIWYG (What You See Is What You Get) and drag-and-drop features. This makes it easier to fill pages with content, but does not replace site developers who are still needed to create the page structure, content type, its fields, and the final appearance of the page. Layout Builder is the big step Drupal has taken towards healthy competition with Tilda and WordPress.
Preparing to creating pages with Layout Builder
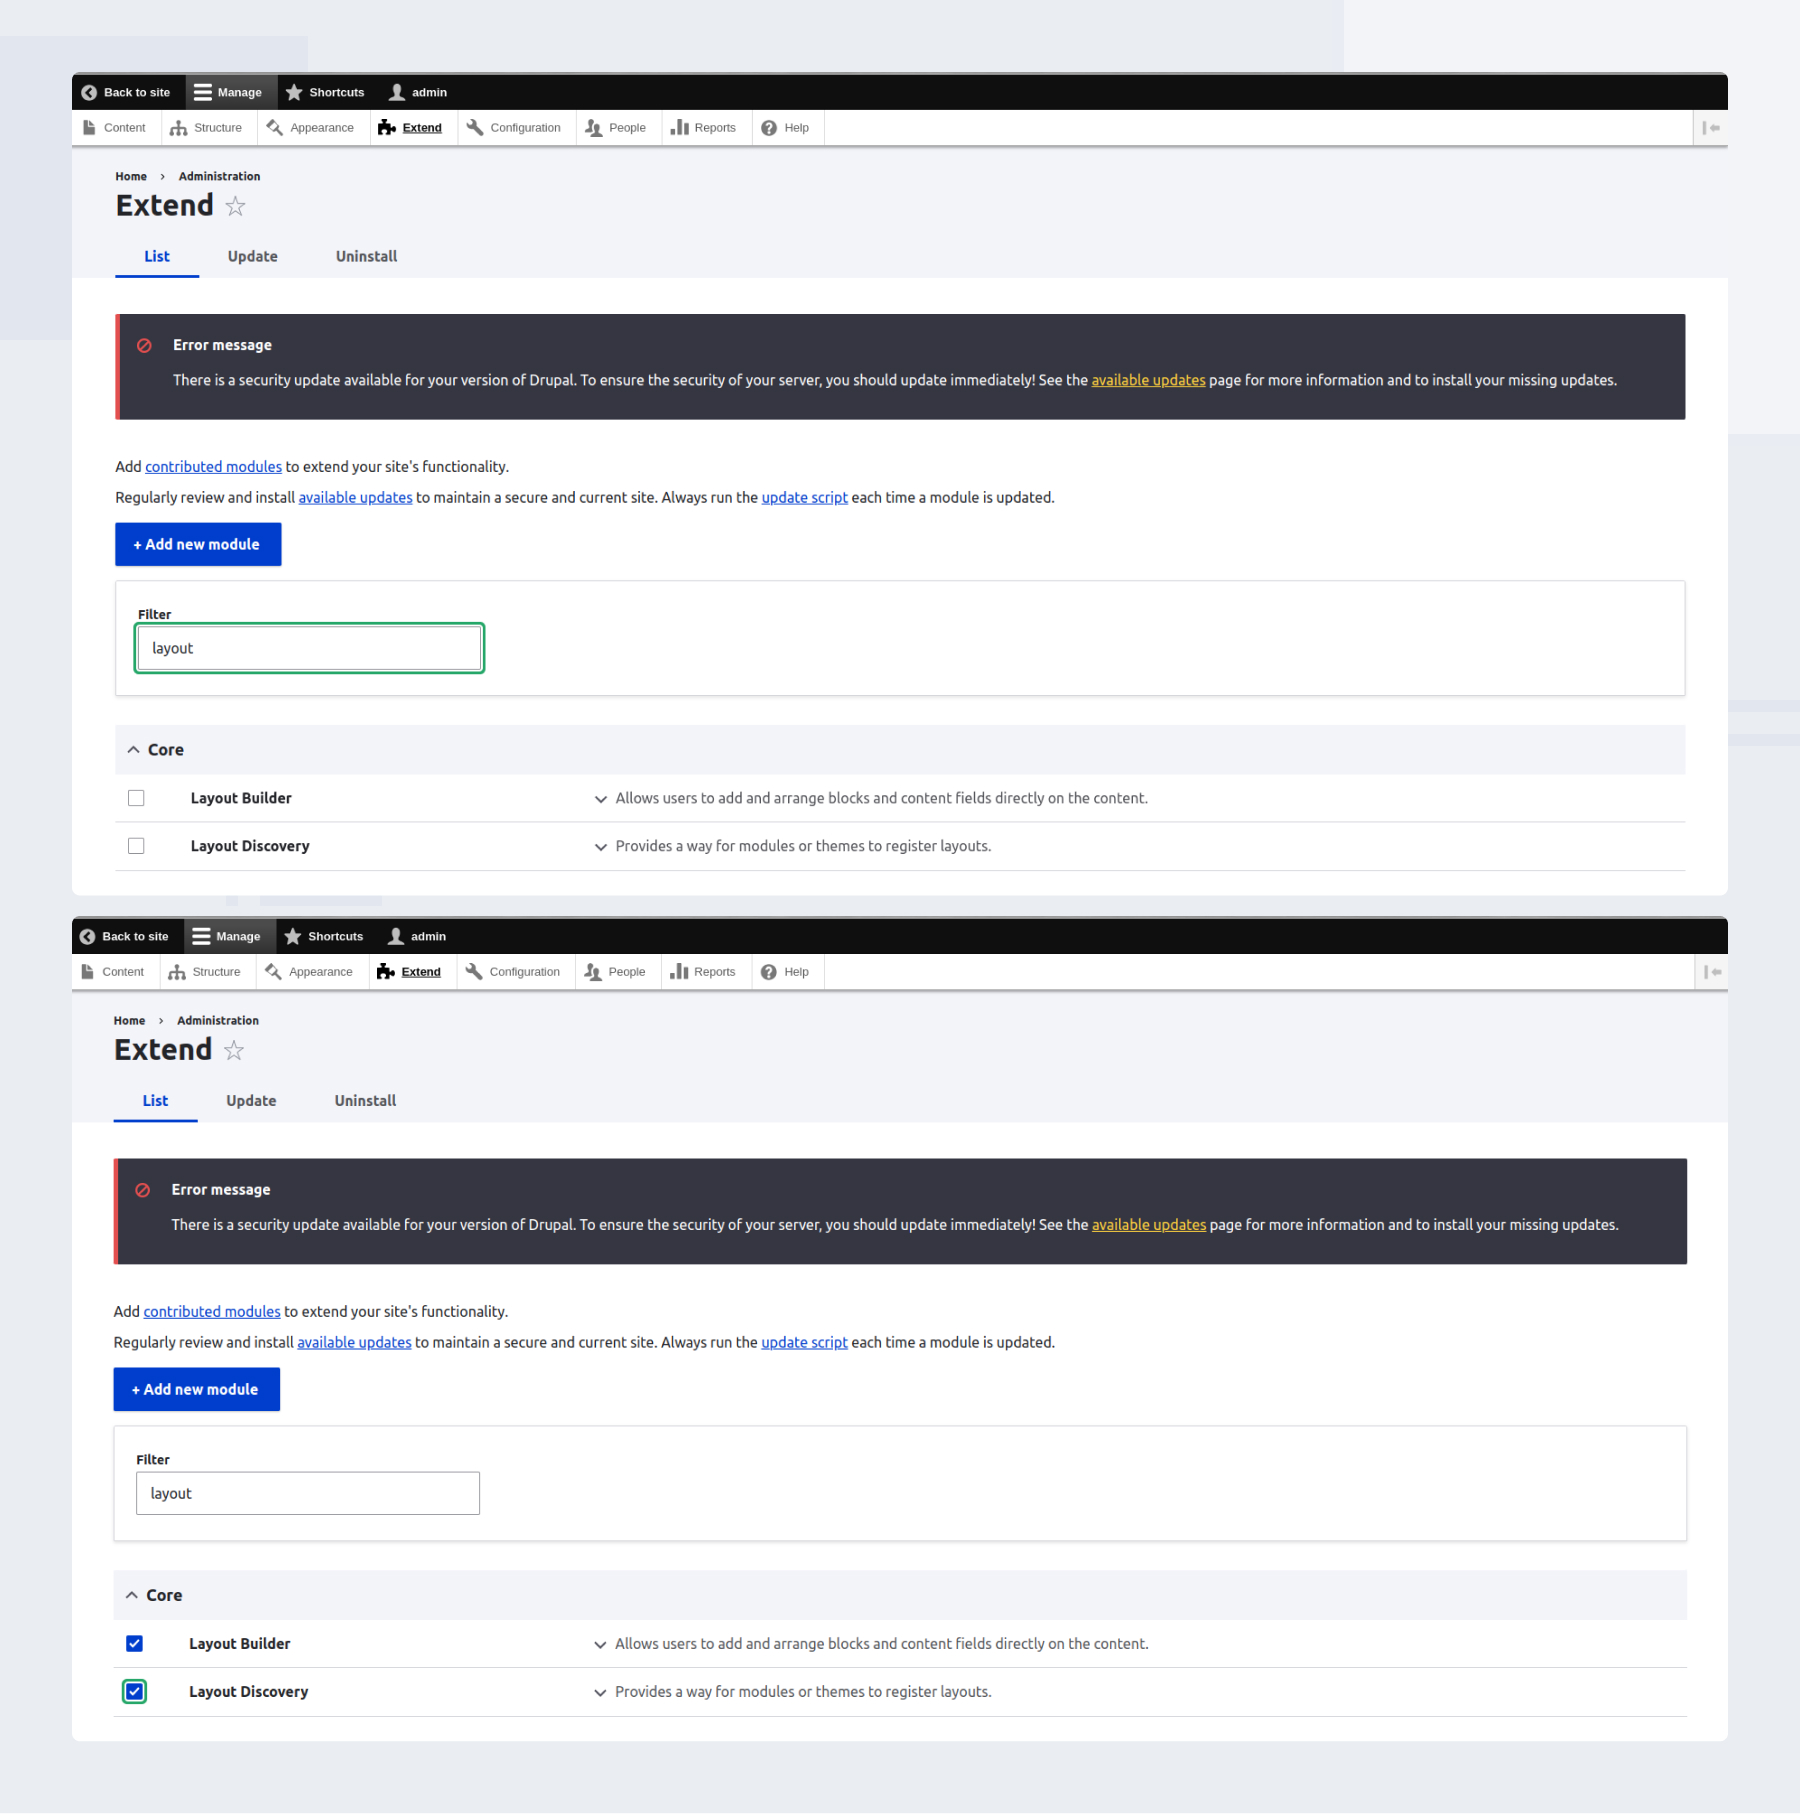
It is probably more correct to call Layout Builder a project rather than a module, since its work is maintained by two modules: Layout Builder and Layout Discovery. The former connects to other modules via API, defines the layout purpose and helps to draw the layouts, while the latter is an add-on to the former that provides an interface to manage the content type within blocks and blocks within sections.
To add Layout Builder and Layout Discovery, place the cursor on the Extend tab in the administration panel, select ‘Install new module’ and check the boxes next to the module names.
Next, we need to create the content type using the ‘Add content’ menu. Let it be an article named ‘test’.

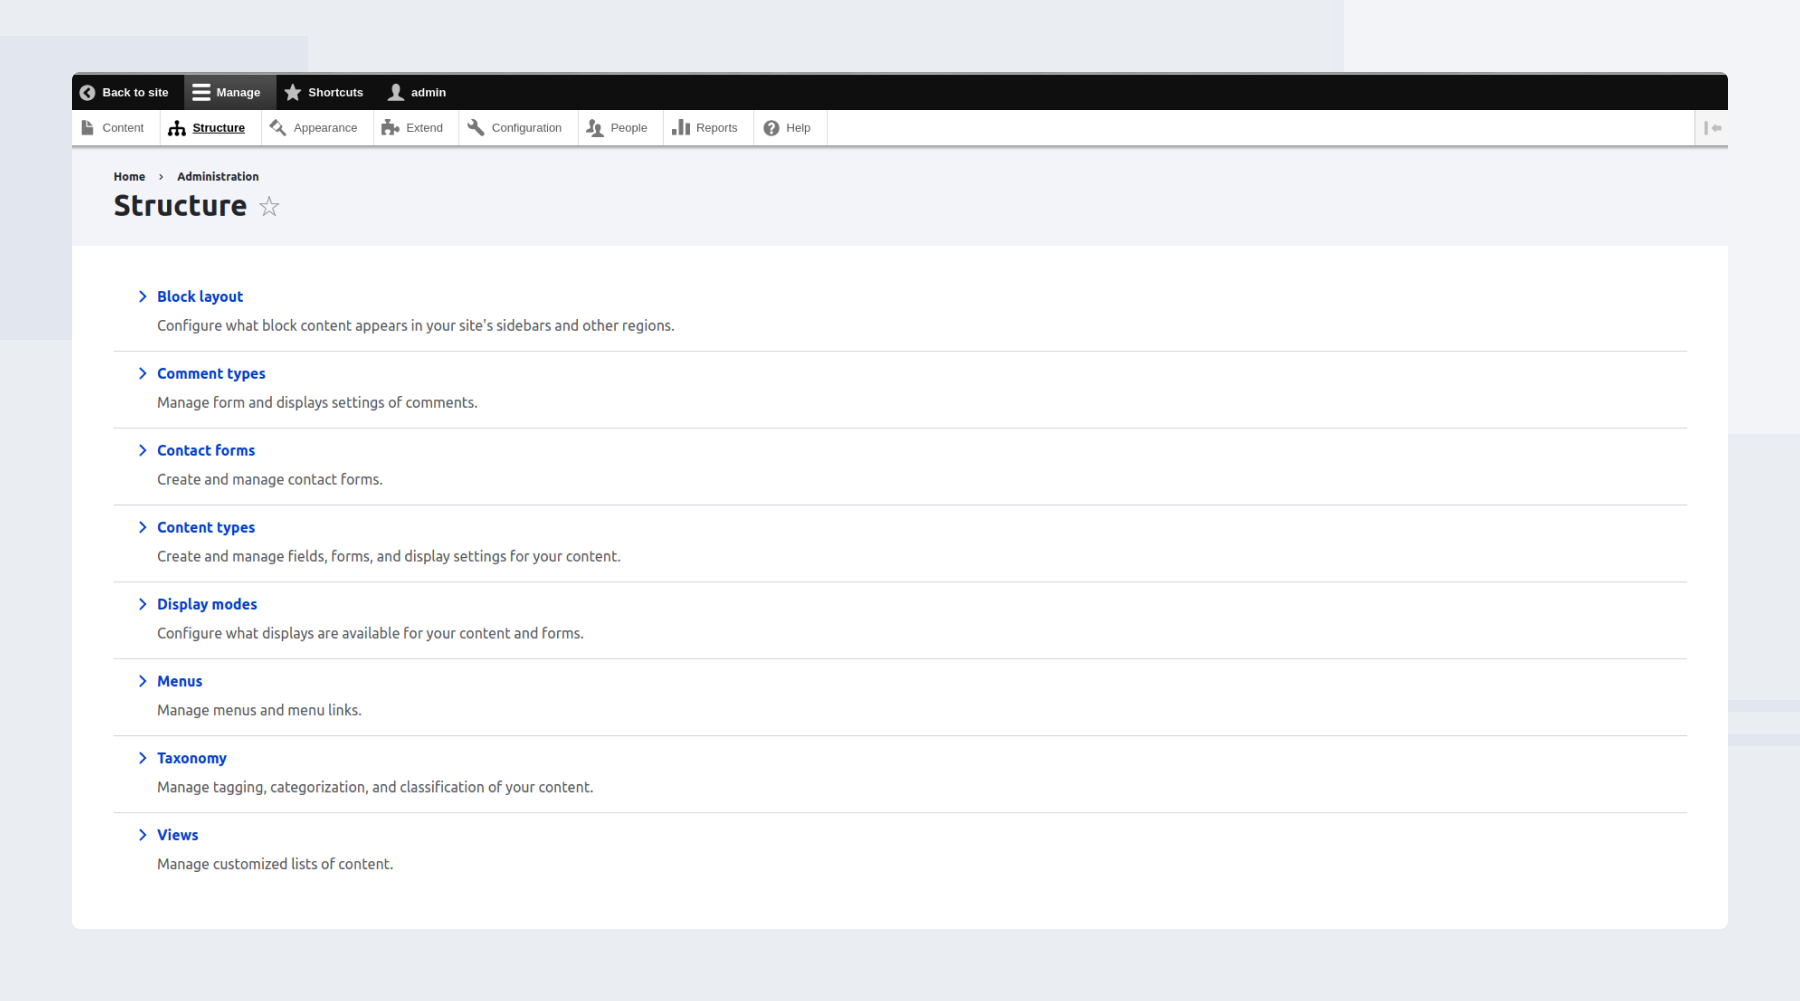
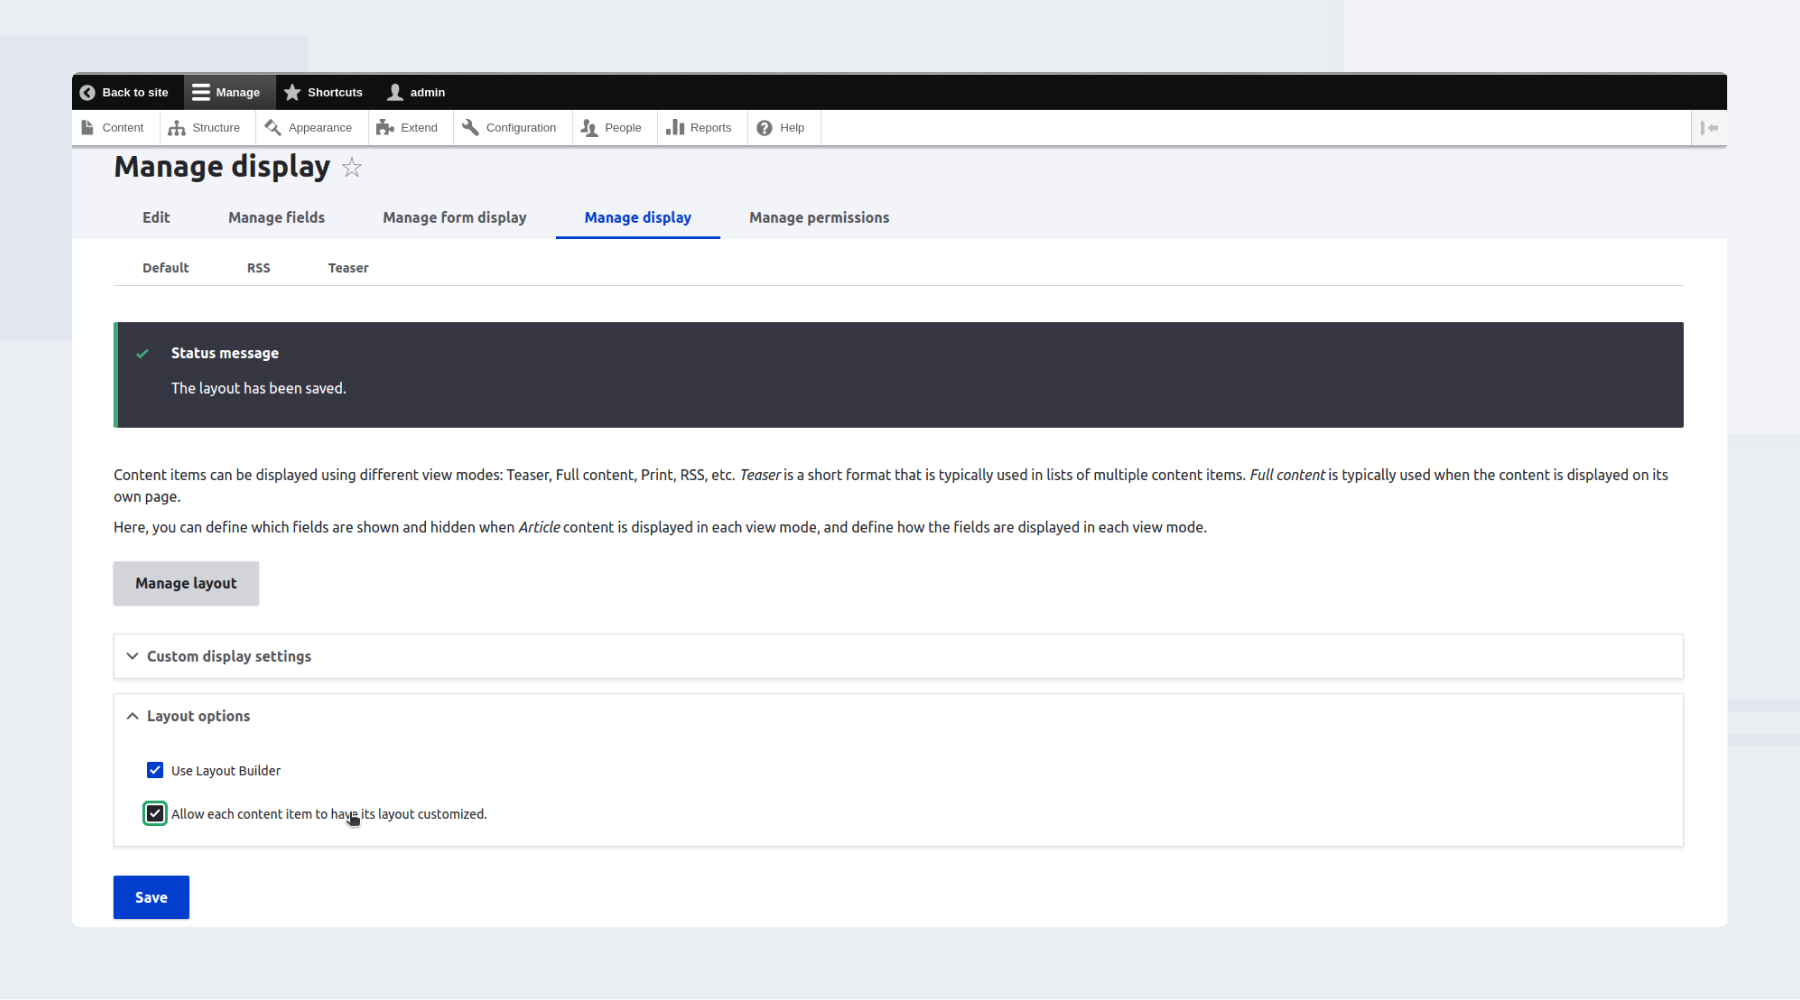
Then, on the Structure tab, point to the Content Types menu item, select Article, and open the Manage Display page. You will see the Use Layout Builder checkbox. Click it to disable the Field Formatter module, which usually sets the way the content of the page is displayed, and the Manage Layout option will be available for you. Clicking on this button will open the screen where you can create the layout of the pages we are going to develop.

Setting the page structure in Layout mode
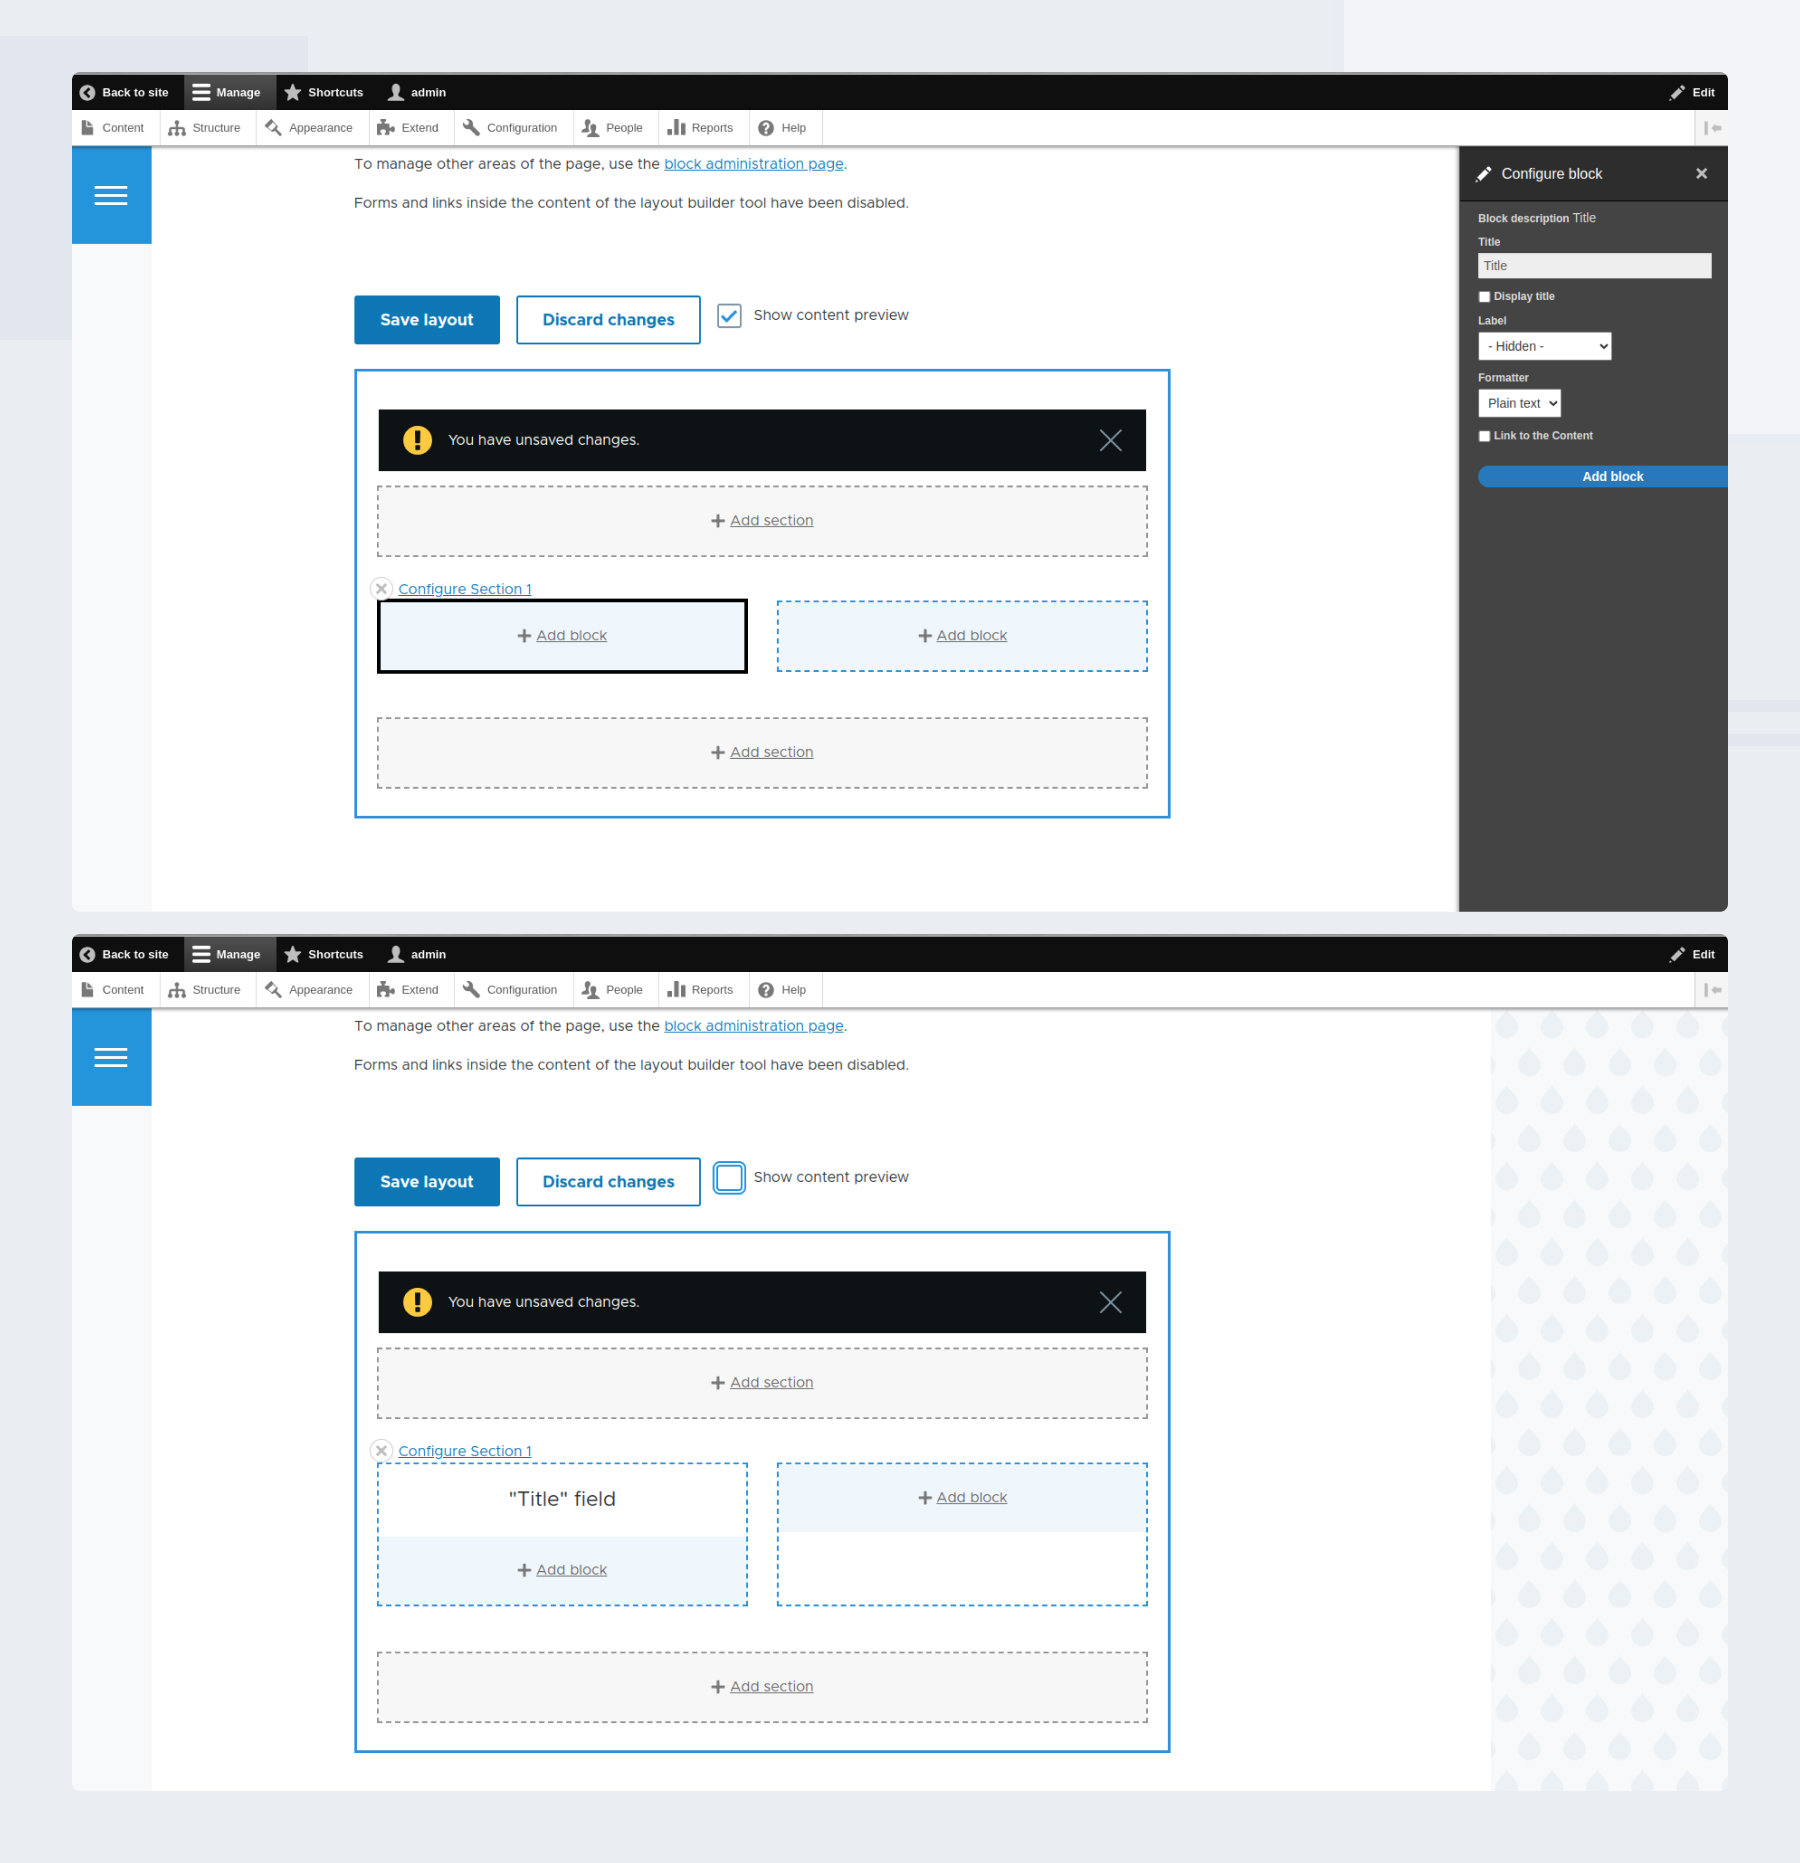
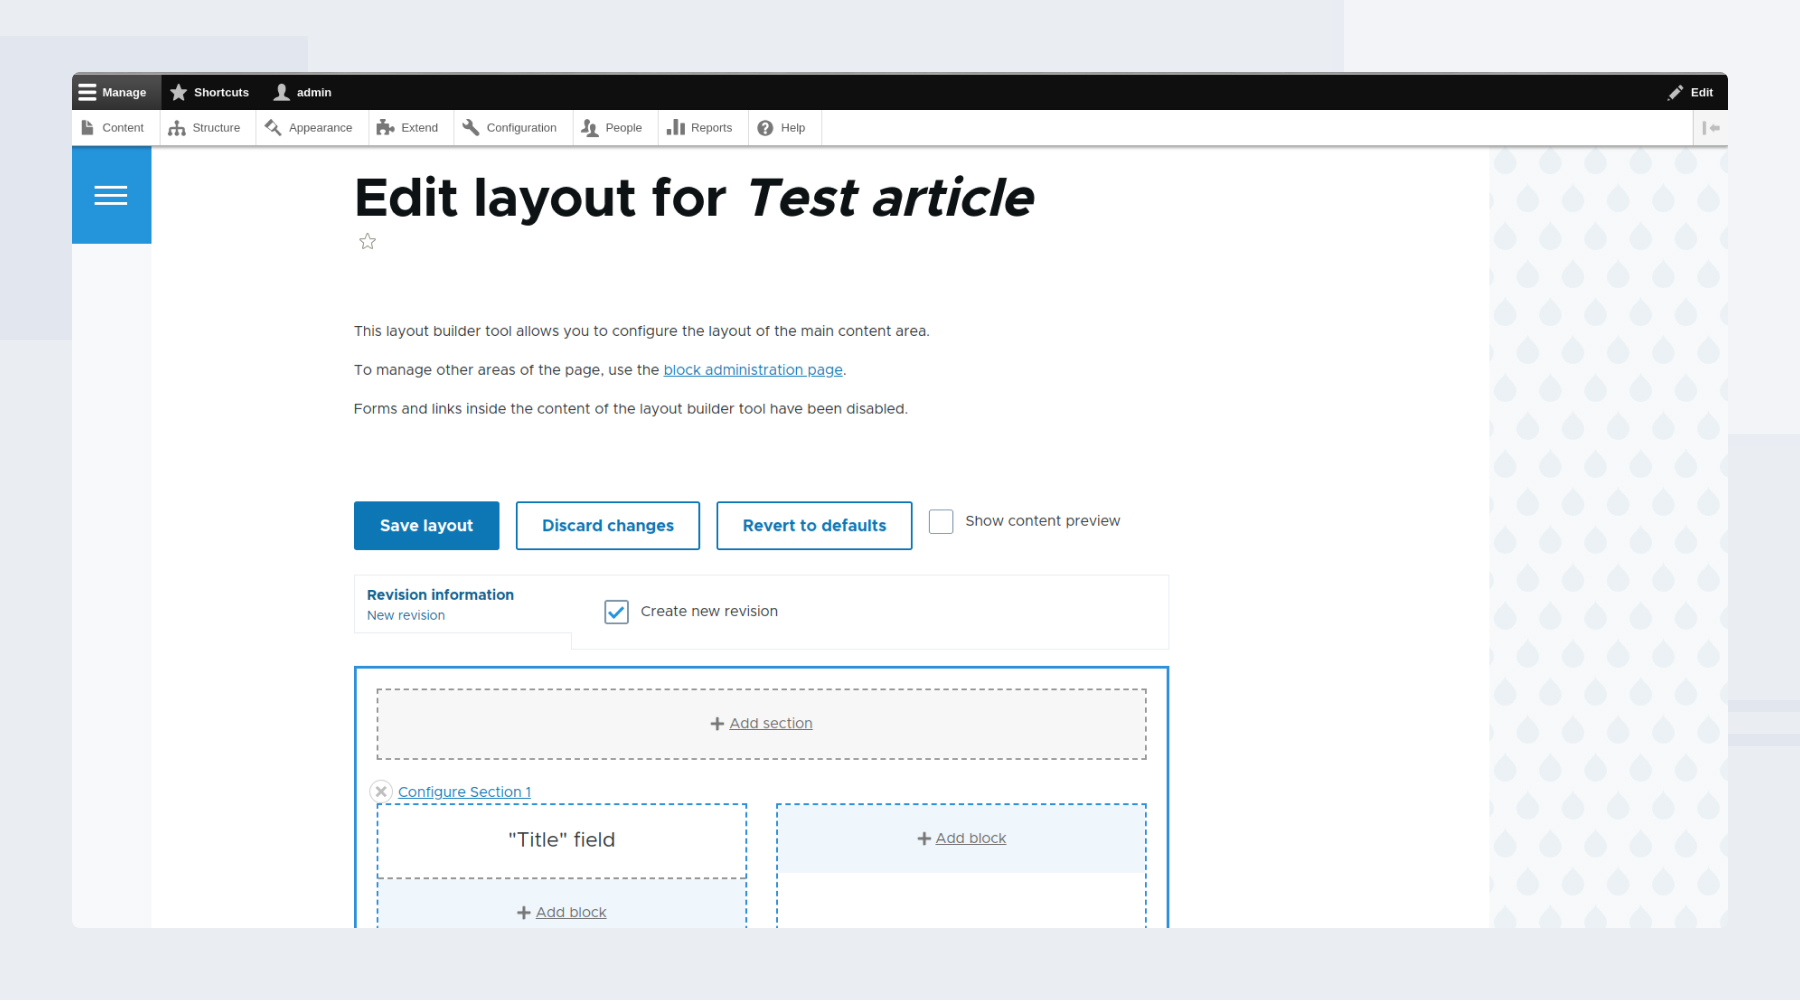
Clicking on the Manage Layout button opens the default page where you can add sections and blocks. You need to set up the required structure for this page.

Click on the Add section to see several layouts that differ in the number of columns. The layout includes blocks such as content fields, views, user fields, etc.

Content types have a number of default fields that are stored in the base and are not accessible to developers for modification (for example, ID). There are also fields that developers create themselves: header, descriptions, images, etc. This field is used to store information of the type set when the field was created. Sometimes fields are created to make it easier to present certain information. You can simply create an HTML field and stuff the whole page into it (just theoretically, as this code means sheer trouble in the future), but every time we edit the node, we will have to edit the entire HTML code. Therefore, multiple fields are created so that you can combine them in different ways.

The developer creates the blocks and sets their position on the Structure/Block page: click the Structure tab and select the Block layout option.
Return to the page you are working on, click on the Add Block button within the section, and on the side panel you will see the blocks necessary to model the content components that will be displayed on the page: text, images, time of the post, author of the post, call to action, form, and so on. In our example, we are adding the Title field. Before it appears in the block (for example, the field with the author’s name, as on the screenshot), you will be offered to set it in the panel on the right.
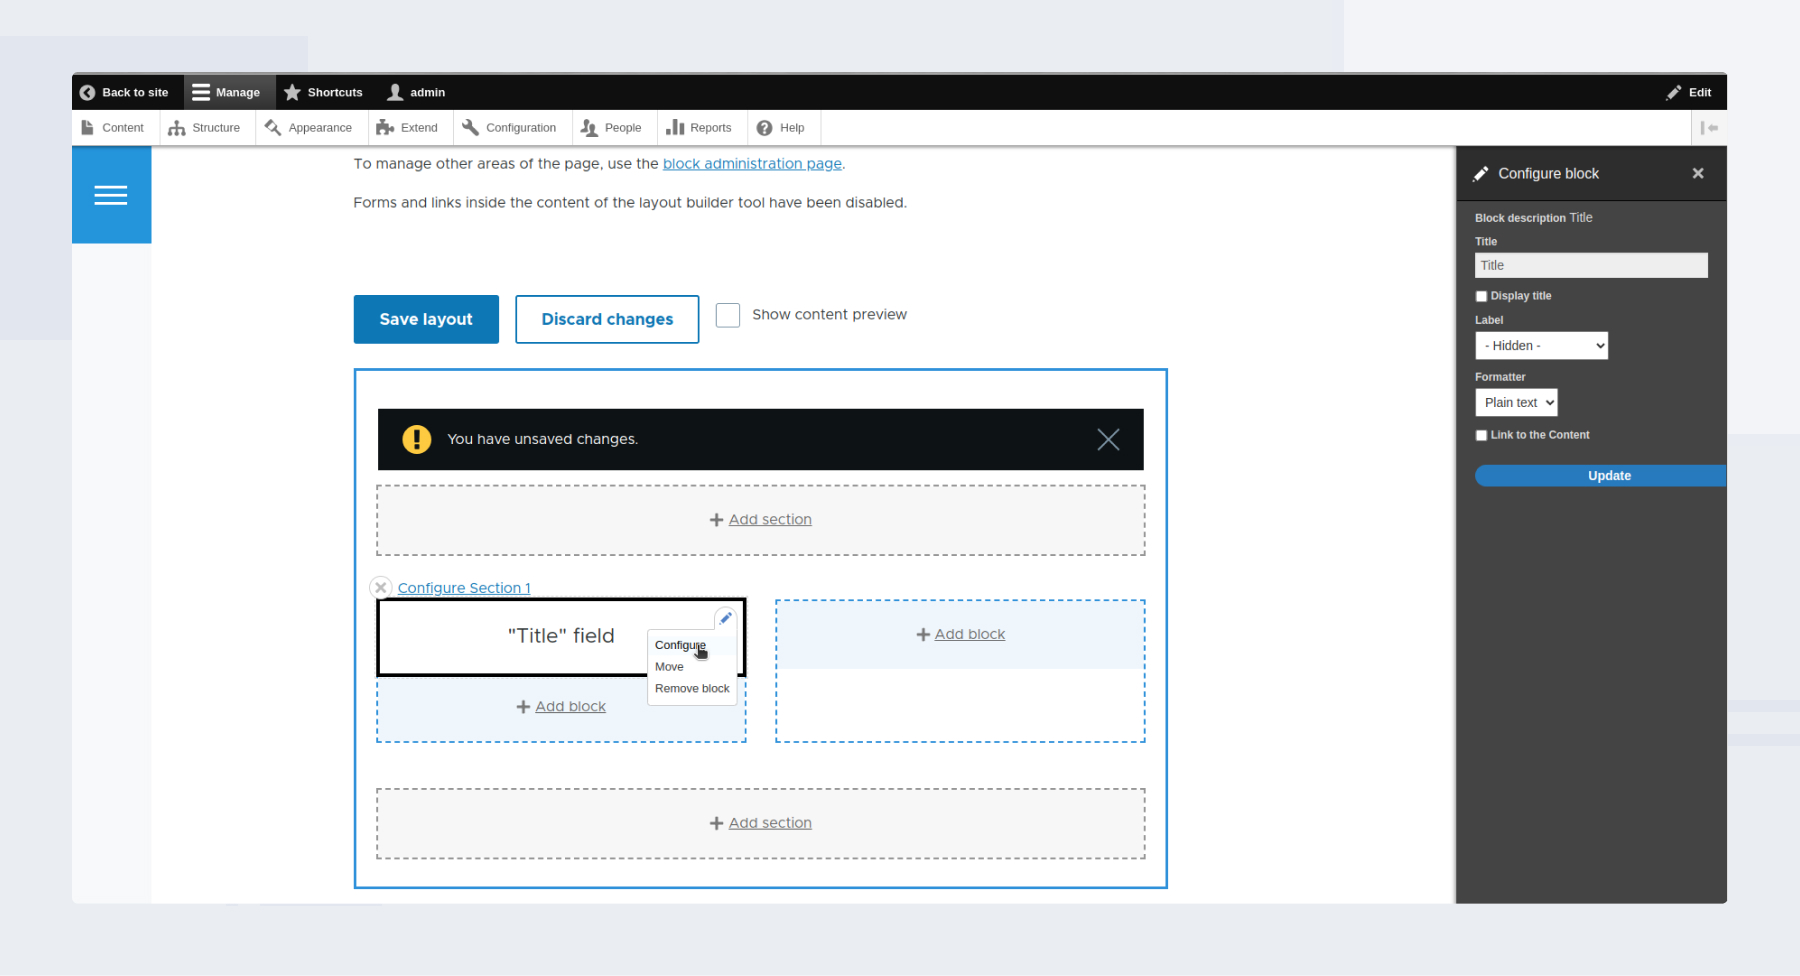
If you need to edit the content in the block, click the pencil icon in the upper right corner of the section, and select Configure.
To save your changes to the layout, click the Save Layout button in the upper left corner of the page. We recommend doing this after each series of major changes. After you save your changes, you can preview the layout with all configured blocks and fields on the page of the content type you are working with.
Default layout override
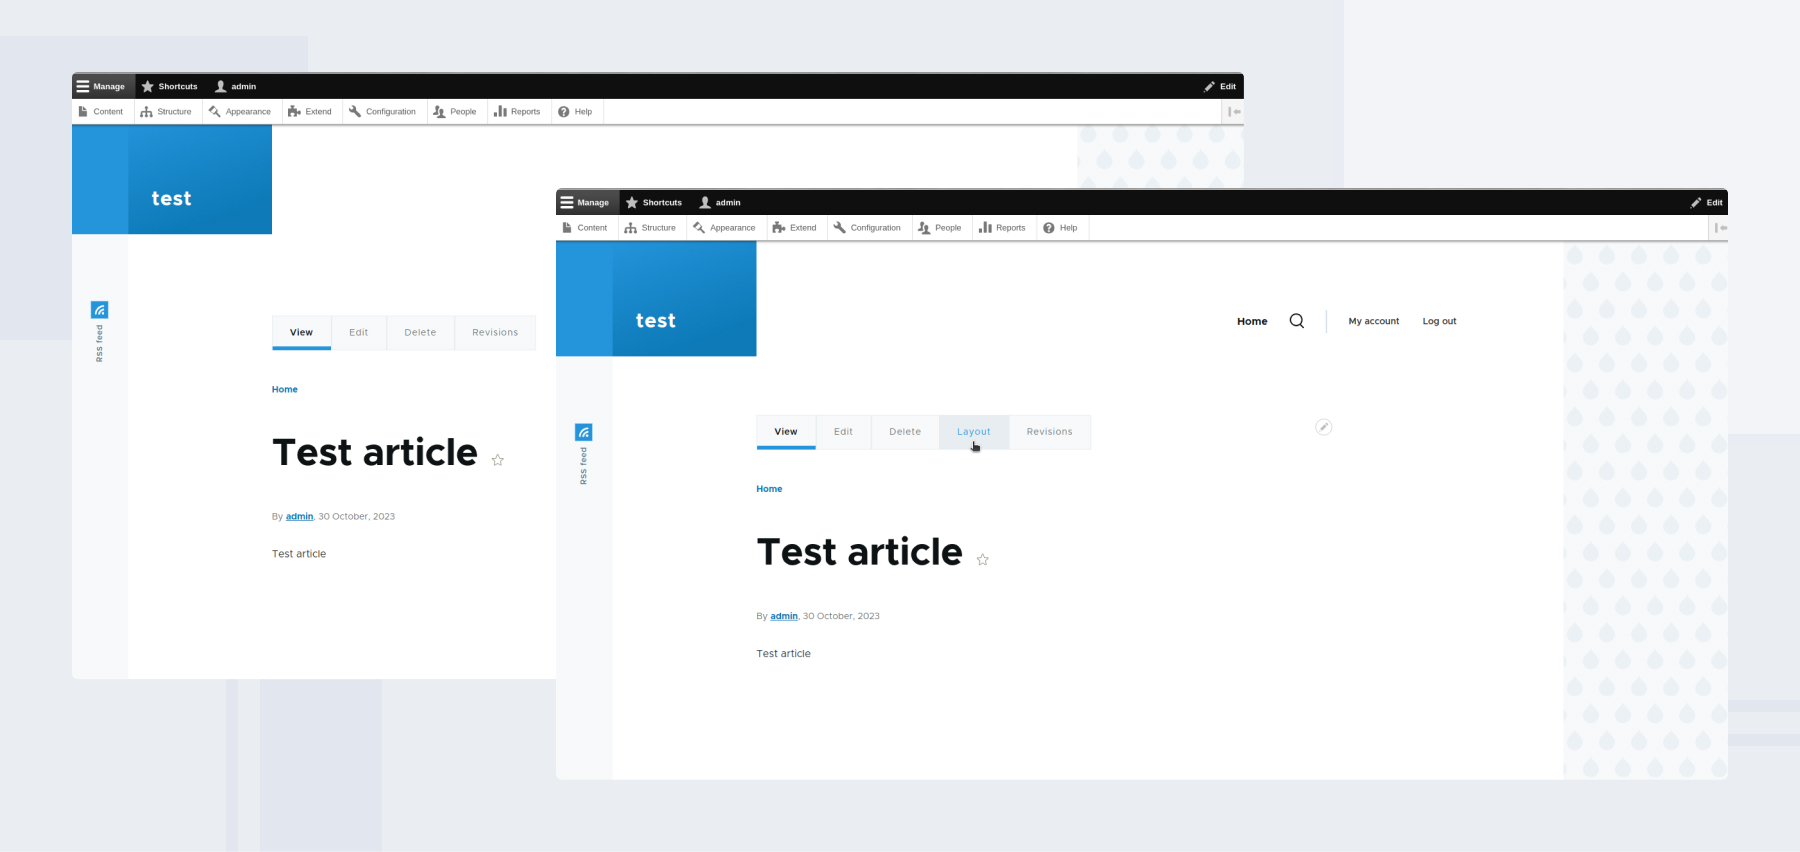
What if the default template you created for the content type does not apply to certain pages of the configured content type? For example, you have an online store and want to highlight a particular product among the others. To do this, open the Manage Display page and tick the ‘Allow each content item to have its layout customized’ checkbox. Now you can create a custom layout for each individual node.
Notice that the Layout tab has appeared among the Local Tasks tabs at the top of the node. Now, if you create and save a custom layout for this node, it will no longer be affected by changes made to the default layout applied to that type of content.
Use the Discard Changes button to undo any changes made to this node, and click on the Revert to Defaults button to disable the reassigned node layout and apply the default layout to it.
Modules that complement Layout Builder
The Drupal community has created many modules that can improve and simplify the process of creating layouts with the Layout Builder. We use only some of them:
- Layout Builder Browser creates the categories by which you can group the blocks that, by default, appear as a single list in the formatter.
- Layout Builder Modal displays the newly added block as a pop-up window on the same page. There is no need to reload the page.
- Layout Builder Component Attributes allows developers to add HTML attributes to the blocks.
- Layout builder Styles lets you select a style from the list to apply to blocks and sections.
An ADCI Solutions’ developer:
In some projects, we created blocks and templates for Layout Builder ourselves using standard tools. This is because what’s available on drupal.org either doesn’t quite fit our needs (and so it’s easier to write from scratch than to modify) or contains too much excessive code and too many dependencies that we don’t want to bring into the site for the sake of, say, a template. In this case, again, it’s easier to write it yourself. Statistically, it always took longer and was more difficult to modify scripts and styles in the existing code than to write your own.
Layout Builder is the most advanced tool for designing pages in Drupal
Like any other technology, Layout Builder has bug fixes in prospect, but we have not heard any radical voice against the module. It does not advocate abandoning the classic Paragraph and Field Group modules, which are used to create components that are further grouped by the Layout Builder. This tool is not so much for head-on development of pages for a Drupal site, but rather helps content managers and site administrators fill the site with content and change the page structure without involving the developer. And it works: in one of the projects where we used the Layout Builder, the content managers are already working without our help, and the site owner is not spending money on small tasks.