Imagine a situation: your mobile application needs to get some information from your website on Drupal 8 using JSON. How to do it without much effort and installing additional modules? How to change the JSON array and send the JSON data with and without using Views? All of the answers are in this article.
How to create and send JSON data in Drupal 8
Good news! You do not need to write code or download additional modules to configure the sending of JSON data using REST and customize a JSON array. Everything you need is already in the Drupal 8 core. First of all, you need to install the Views and Rest modules and determine an exported content type. If you have never worked and are not familiar with the Rest module, I recommend that you read this guide on RESTful web services in Drupal 8 before continuing with the rest of the article.
Send JSON data with REST and Views
Step 1
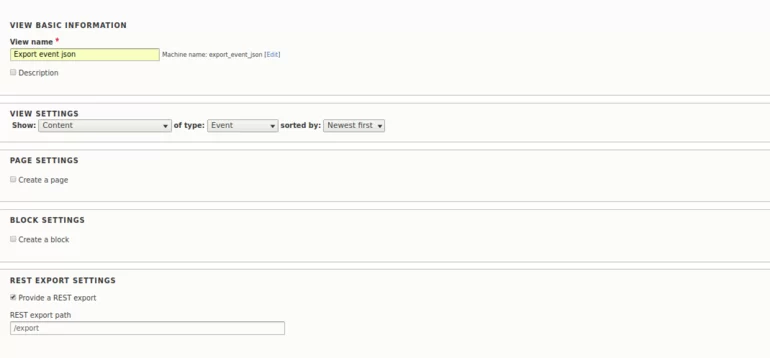
Create a new view. At this step, you just select a name and content type, click REST EXPORT SETTINGS, and set a path via which you will later get the data in the JSON format.

Step 2
Choose fields. If you choose an entity, JSON will send all the node fields at once but if you select fields, you can specify the fields that you want to send.

Step 3
Choose how this view should be styled. I choose a standard option — Serializer (Region Format, Show > settings).

Step 4
Choose the JSON format (Region Format, Serializer > settings).

In the view, I selected ID, title, and body fields. The view will form an array only from the data that these fields contain.

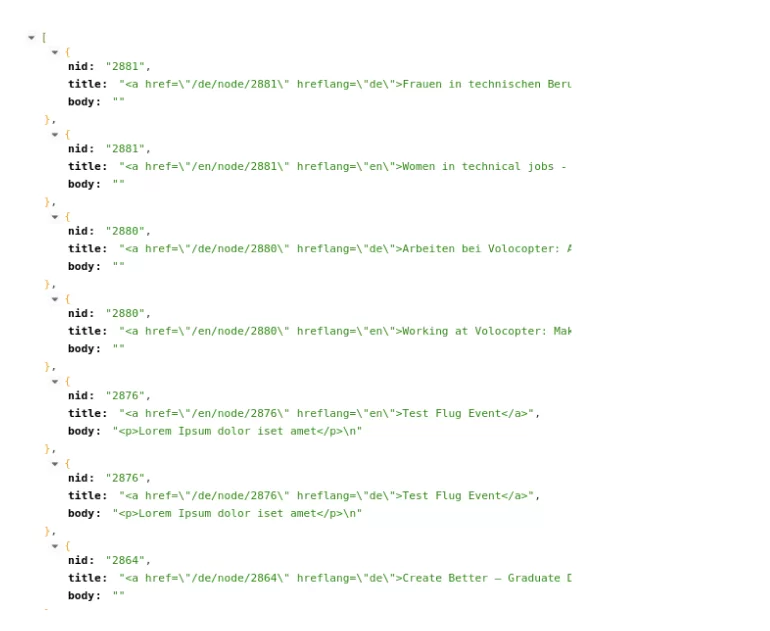
With the help of the Rest API Testing extension for Chrome, I could get this result at the address of the created view (http://hostname/export).

Send JSON data with Normalizer
With Views, you can customize a JSON array and specify only the certain fields that will be returned. But what if your application needs to receive the JSON array in a specific form that you can not configure in Views? You can take advantage of Normalizer. In the custom module, we create the file “services” and necessarily set the priority higher or equal to 2, so that a custom normalizer is executed with the highest priority. Otherwise, nothing will work.
Next, add a class to the / src / Normalizer folder. Since the Rest module allows different content on a site to be received in the JSON format, with the help of a custom normalizer, we can redefine a type of the given array for the event content type (or for any other type).
Thus, we can also redefine the output of our view that was created in the previous method.
Send JSON data with Controller
However, redefining an array through normalizers can be too inconvenient if you need to get the absolutely custom JSON array from a specific path. In addition, an override of the normalizer will affect the JSON structure of all the nodes of this content type, that’s why you can use a simpler method: you can always send the JSON data using the controller having adjusted this data to a certain path. And this method can really help to solve a more specific problem. For example, in my case, it was necessary to place all the nodes in the common array, which is very difficult or even impossible to achieve through a view. You can learn how to create a custom module with a controller in this article on OOP in Drupal 8.
First, create a routing file and assign a path that will use the GET method to get JSON.
The controller file will look like in the code sample below. Using the custom method in the controller and JSONResponse, we can send the JSON array exactly as we want it to. Here we do not use hardcoded Symfony and the Rest module methods in order to change the JSON array but create our own.
Conclusion
I showed you several ways of working with REST and JSON in Drupal 8. Each of them was useful to me to some extent, and I hope that they will reduce the time to find a solution to a particular problem.
If you want to use any of those solutions, you may find the code on GitHub. We are always ready to help you connect a Drupal 8 website with a mobile app.
Useful links:
1. OOP in Drupal 8 and how to use it to create a custom module
2. RESTful Web Services in Drupal 8 quick start guide
3. Why migration from Drupal 7 to Drupal 9 is a big deal


